3xS Top Completed

7 12 2014

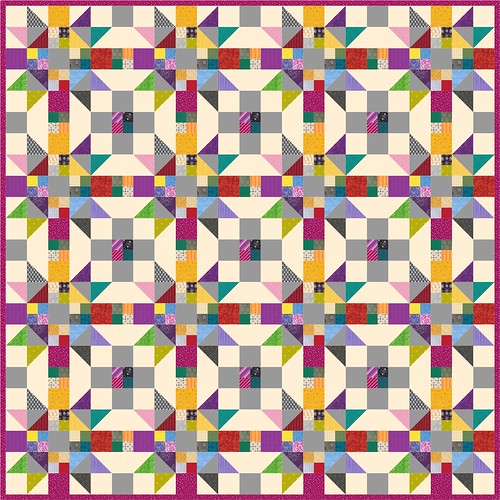
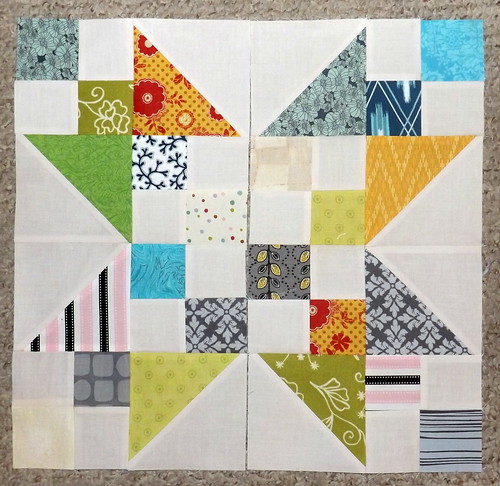
Once again, I sewed until late on Friday night, hoping to finish a top in time to take advantage of the early morning light. Unfortunately, I didn’t quite meet my goal, but I did get up early yesterday to finish the top, called 3xS (Scraps, Stars and Squares).

3xS (Scraps, Stars & Squares) Full Top

I don’t think the picture does the quilt top justice. I took the photo in the middle of the day, and though the winter light seemed weak, it was enough to bleach out some of the colors.

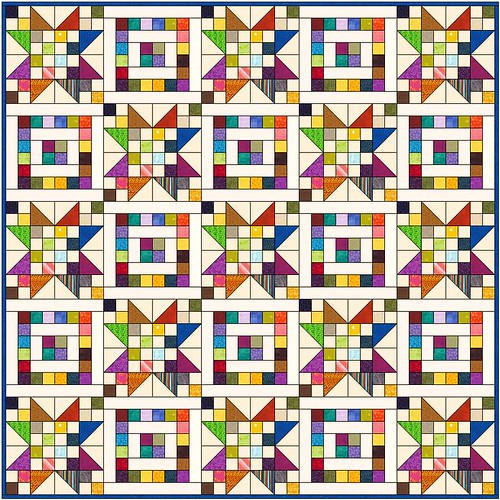
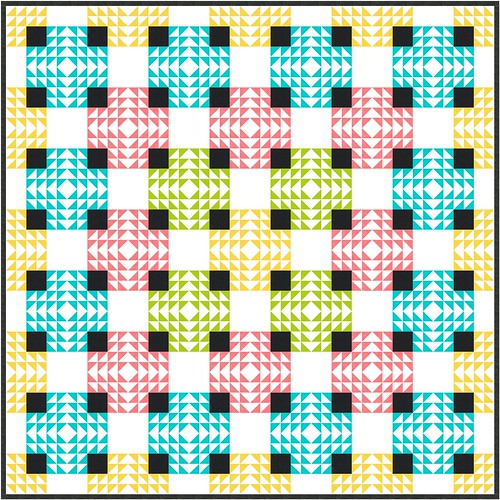
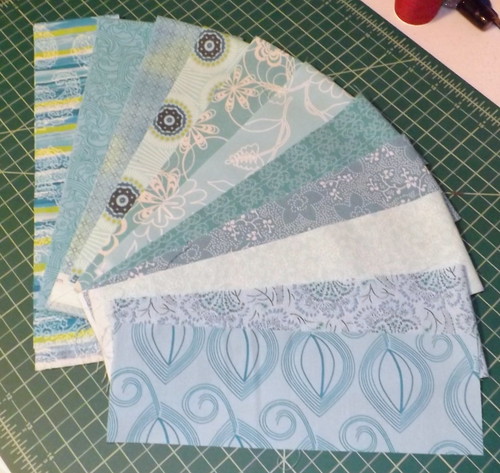
Since I have so many scraps precut now, I’ve already designed another top to take use up some of the scraps and some of the solids that I have sitting around:

Scrappy Project II

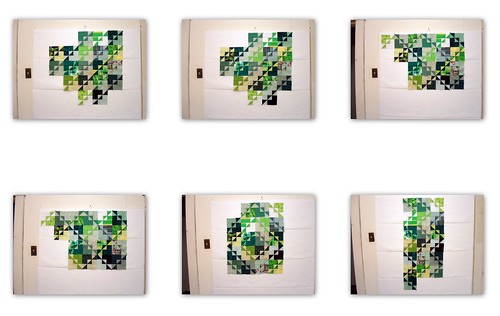
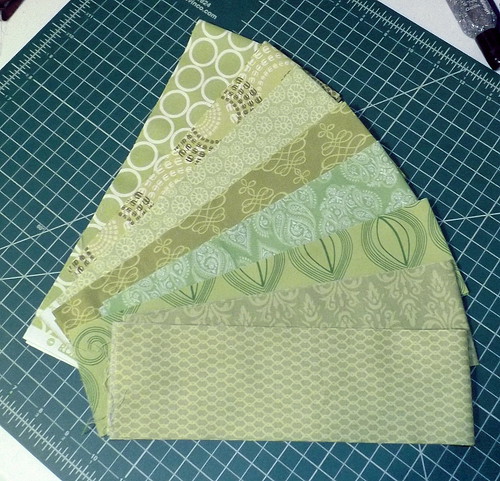
Getting to the starching, ironing and cutting of the fabrics is going to be a bit longer, though I still predict that I’ll have this top done by the end of the year. Another, more urgent project is taking priority…

I’m rearranging my sewing space once more. We’re still trapped in our two bedroom apartment, and will be for another year while I recover our savings and get us to where we want to be – having another adult in the house over the summer hit us more than I like financially.

Due to being here longer than I planned, I’ve determined to set my quilting frame back up. It’s a Little Gracie II, and will handle up to a queen sized top. Not as big as my largest projects, but enough to allow me to finish at least half of the tops that I have sitting.

If I plan well, I might even be able to do king-sized projects. I just need to do them in segments, and then join the segments. I’ll figure that out later, after I’ve had a chance to play with the setup, and get my confidence up. I’d try to master FMQ on my domestic machine, but the Brother PC210 just doesn’t handle FMQ well and I spent the money on the frame and the Janome that came with it. I ought to be getting my money’s worth out of them.

So, starting yesterday, I began moving my stuff from the former dining room, and into the living room. Most everything is moved, I just need to figure out a bit of storage space. Right now I’m using an all metal filing cabinet for my fabric. The fabric might have to move back to a bookshelf. Not a big deal, except for figuring out how the hell I’m getting the cabinet OUT of the apartment.

Anyway, back to the trenches! This project isn’t getting done while I’m blogging!


Progress!

17 11 2014

Night Sky Quilt Top

I finished putting the Night Sky quilt top together on Friday evening. By then, due to our shorter days, there was no light to take photos. I had some time before leaving for work today, so I quickly threw the quilt down onto the snow and ran back upstairs to take a photo over the balcony.

My neighbors must think I’m insane.

Granny Square Swap Top Start

In other news, I did manage some progress on the Granny Block top, using the swap blocks I’d received. I still have a lot more blocks to make, but I didn’t feel like digging through my stash last night for aquas, greens and greys. Instead, I dug out of my scrap bucket.

Because the blocks didn’t all trim down to the same size, I’m using the setting triangles to equalize them. The blocks are finishing at 12.5″.

I’m using greys and creams from the scrap bucket, or smaller yardage stash to do the setting – I don’t want to cut into larger pieces for this project until I’ve exhausted my supply of smaller pieces of fabric.

This is also the reason I haven’t yet pieced all of the blocks I need to make up the difference between what I have and what I need. I want to go through the scrap bucket first.

I have a lot of scraps, though.

Because I’ve been lazy, and not cutting them down immediately. Usually, I cut my scraps into 5″, 3″, and 2.5″ squares, and then into strips for quick strip-piecing.

I haven’t done that in a while, so I have a bucket full of pieces that need to be ironed and then cut down, and not just in the required colors. I’m going to buckle down over this evening and next, and focus on that.

And not just for this project. I like to have a scrap project or two going, to use up what I’m generating in scraps.

Yes, that means I started another project.

Another Scrappy Project

I’ve had this EQ7 project for ages, intended to use up the 5″ and 2.5″ squares that I have pre-cut. Since I’m going through my scraps anyway, and starching this batch of scraps (such a difference in how nicely it all cuts down!), I decided I ought to use up some of the solids yardage I have hanging around from deciding to NOT do a Dear Jane.

I bought 20 yards of an ecru colored solid, which I don’t regret. The fabric is a neutral color. I can use it in everything! I just need to use it.

Another Scrap Project

So, it’s become the background solid for blocks like this. Pictured above are actually two halves – I’m attempting to ensure that a fabric is not repeated in the same block. I’m also not letting myself fret too much over the inclusion of creams, and how they kind of disappear into the background fabric. It’s a scrap quilt!

I need to starch and iron a lot more yardage of this solid fabric, so I can start on the alternate blocks, which should use up a lot of what I have sitting around in scraps.


WIP Wednesday – Planned Scrappy Fun

11 06 2014

I have a lot of WIPs to get back to, but rather than finish any of them, I decided to start not just one new project, but TWO.

Yup, logic.

Winged Square II

I’ve been slightly obsessed with making this particular top since making a couple of blocks for a swap last year (see this and this). Staring at the fabrics I have in my stash, I decided it was time. I have plenty of each of these four colors. So, I ordered a bunch of Kona white, and I’m in the process of trimming way too many HSTs. I’ve got the total number of HSTs worked out somewhere. Suffice to say, it’s over 1500 HSTs.

Funny thing, I’d planned to cut enough strips to get 24 HSTs of each fabric I’m using… I ended up cutting enough for 48 of everything, though I need a few more aqua prints to keep it to 24 of each fabric. Rather than just throw the other strips into my scrap bins, I decided I ought to do something with them.

Then I saw this posted to Flickr:

Scrappy 2

My brain latched onto the image in the lower right hand corner and I drew up the following:

Scrap Zigzag

It’s pretty simple, but the idea is to use up a bunch of the neutral and low volume fabrics that I’ve collected and have no destination for. It’s time to use them up and get them out of stash!

So I’ve cut a lot of 3″ X width of fabric strips (for both designs), and some 2.5″ squares (for the zigzag design). I have pieced about half of the HSTs I need for the winged square design, though now I’m trimming them. Yay. Actually, I don’t really mind trimming. It’s something fairly mindless that can go quickly as long as I’m doing something like watching a show or listening to an audio book (damn you, Audible, for addicting me!)

You’ll notice that I tend to design my quilts in solids, or in tone on one. This is because I love to work in a planned scrappy format, and I’m just looking to get an idea of how to arrange the fabrics. I’ll let the fabrics in my stash tell the color story on their own, and I’m too damned lazy to scan my fabrics in, edit them to an EQ7 friendly format, and then import them. On top of that, I tend to buy tone on tone fabrics, or blenders, anyway. I’d much rather have a lot of staples to choose from, then a bunch of focus fabrics that I wouldn’t know what to do with.

Anyway, to give you an idea of what I’m working with:

Strips 01

Strips 02

As I said, I need more aquas… between six and eight. I could just double up on the number of strips. We’ll see if I end up going that route. I’m the type who will always lean toward more variety. I still need to photograph my yellow and pinks. Maybe this evening, assuming I get all of my green and aqua HSTs trimmed.

Linking to WIP Wednesday at Freshly Pieced.


Playing in EQ7

22 08 2013

So, just a bit ago, I wrote about trying to unwind each day by spending at least half an hour sewing after getting home from work…

I haven’t kept to that resolution very well, unfortunately. I’m now six business days away from the start of the new semester, and drowning in the tickets that are flooding my help desk. The campus population is returning, and with it, the problems that they need to have resolved.

*sighs*

So, I’m coming home mentally drained, so drained that the act of sewing is just too intensive some times. Still, the creative urges won’t always be silenced, so I started drawing quilts in EQ7. I may never get around to making the quilts I draw up, but at least I’m burning some steam off.

Flying Xs

I’ve been trying to find ways to use a particular Erin McMorris print for ages, since I bought it at a WI Quilt Expo a couple years ago. It’s gorgeous, but it’s a large scale print. I find myself exceedingly reluctant to simply delegate this fabric to a backing. So, I’m going to play with a couple of designs where this particular fabric is the background.

Medallion 01

I’ve wanted to make a medallion quick for as long as I’ve been quilting. I might actually do it one day…  The trick is making it as loud in fabric as it is in my head. This is definitely something for which I would be spending quite a bit of time collecting the perfect fabrics.


Swirling Sea of Stars

24 03 2013

Spinning Spider Web

I know! Another quilt design, and yet one more intended to help me do away with my scraps and stash. I have to admit that this particular idea has been swimming around in my brain for about six months, gestating until it was ready to spring forth fully formed, like Athena from the cranium of Zeus.

In cleaning my sewing space and reorganizing my fabric stash, I came across fabrics that had been purchased with the intention of becoming an Ironworks quilt. I generally try to make each pattern that Sandi makes public, because I think she’s awesomely creative with designing quilts, and because her designs allow me to try new things. Such was the intent with Ironworks – a purely solid quilt, something that I haven’t yet done.

It’s been a while, though, since I bought these fabrics, and I find that I’d really rather not make Ironworks, at least for now. Rather, I’m very much of a mind to continue the pursuit of eliminating my scraps and using what I have on hand.

The design above allows me to do both of these things. Approximately two yards of each solid will be needed, which is what I have on hand. Another 1.25 yards will be needed for the binding, according to EQ7. This too, is easily accomplished. Five fabrics were purchased for Ironworks, and four of them will be used in the body of the quilt top. I’ll simply use the fifth fabric for binding.

For the sake of accuracy, I’ll paper-piece these. I’ll also use these as a leaders and enders project, to keep from getting burned out on these, as I have with the scrappy blocks for Frankenstein.


The Taming of the Scraps

30 07 2012

Working on Fun with Free Piecing (which should really be called Cheating on the Farmer’s Wife, Part Deux) illustrated to me that I really, really need to get my scraps under control. I have a lot of them. I could probably fill a kitchen garbage sack with them.

And, silly me, I started browsing the internet. Enter the pins and bobbins Made in Cherry Quilt Along. I looked at the requirements for the project, and mentally said, “That’s easy!”

But first, I drew the project up in EQ7, because I do that:

Made in Cherry
The original, Sarah Fielke pattern didn’t have any borders, but I think I much prefer adding the two borders to this. I just really like scrappy borders, and any reason to use them, I swear.

So I started cutting charms. I’ve decided to try and do a similar quilt, but one in which each charm is unique.

Made in Cherry Charms

1. Made in Cherry Charms 1, 2. Made in Cherry Charms 2, 3. Made in Cherry Charms 3

So far, I’m 77 charms into prepping for this. Okay, so not just for this. I’ve spent several hours cutting scraps into four manageable sizes:

Trimmed Scraps

So  now I have a lot of pre-cut squares. I suppose it’ll be nice. I’m a little terrified that I actually went and cut 1.5 X 1.5″ squares. I see a postage stamp quilt in my future if this keeps up. Or a couple of Made in Cherry pillow shams.

Darn it! I need to stop planning projects!!


Process Post: Quilting Decisions

16 07 2012

As Fun with Free Piecing comes closer to a completed quilt top (far faster than I would have thought possible!), I found myself considering how to quilt it. My original idea, was to do off-set straight line quilting:

FwFP Quilting Plan 3

This particular idea was scrapped very early in the drawing stage, as you can see, though I saved it for reference. I didn’t like the idea of quilting through all of the seams in the free-pieced sections. Early on in the process, I decided, though that I wanted to use multiple colors of thread, to stand out against the gray.

FwFP Quilting Plan 2

Here, I forgot to change the thickness of the lines I was drawing, which might have had something to do with my dismissal of this particular quilting plan. I initially thought that the  random straight lines could be fun, especially if done in multiple colors of thread. I rather liked the idea of echoing the free-piecing in the quilting. Then I drew it out, rather than test it on the sandwich itself. No love here.

FwFP Quilting Plan 1

Finally, I thought to try echoing the rectangle shape, creating a brick and mortar illusion, thanks to a co-worker’s suggestion. Again, I went with multiple colors of thread, because I was still loving that idea. This, I think is a winner!

I love the depth this gives the design. Having said this, I think I’m going to change the quilting in the outer gray border and in the two long horizontal segments that currently show straight line quilting. I might do those in shorter quilting lines that are perpendicular to their alignment, or the idea of an echoed zig-zag in those areas appeals too.

I’m going to add a page to this blog, dedicated to contrasting the digital design to the physical quilt that comes out of the process. It’ll be picture heavy, but I think it’ll be a lot of fun. Plus, it’ll be a more condensed way of showing some of my process, when my process actually involves planning to this degree. Of course, this page won’t go up until such time as I actually COMPLETE a quilt, down to the binding, from a digital design.

EDIT: Anyone want a tutorial for this quilt? I’m debating writing one up.


Fabric On Its Way…

13 07 2012

Hopefully anyway!

Kona Order

I ordered the fabric for setting my Farmer’s Wife blocks. So excited to get this stuff in and play with it! I decided on Kona solids, since every block uses prints. I also wanted to go with a range of colors…

Farmer's Wife Plan

Yup, the EQ7 illustration above is the plan for the Farmer’s Wife blocks,  courtesy of Sandi at Piecemeal Quilts. More gray, because I’m kind of obsessed right now. Gray is eating my brain. Ignore the fact that those aren’t the FWS blocks – I was too lazy to re-draw them or look them up, especially since I was mostly concerned with just the setting at the moment.

I’m digging this – I really just want to get started!


More Fun with Free Piecing

11 07 2012

Fun with Free Piecing

I couldn’t stop. I’m going to have to follow this project through to a completed quilt top. Thankfully, I can zoom through four or five of the scrappy centers in an evening. I drew up the completed project in EQ7, so that I  could figure out how much background fabric I’d need, since I only bought  two yards, and my intention had been to quit when I ran out. EQ7 tells me I’ll need 4.25 yards… I’ll have to see how many patches I’m getting out of each fabic strip and see if that’s correct.

I’m finding myself fascinated by how one scrappy block will inform the next, as I pull larger scraps from the baskets and create little fabric mosaics that are further sliced and diced as I add to a 2.5″ wide stripe.  Scraps, of course, are not being used as quickly as I would like, but it’s nice to start using these bits and pieces of fabric that I haven’t had the heart to throw away.