Second Finish of 2016

19 01 2016

I’m on a roll!

Sort of.

In all fairness, this quilt was like, 70% quilted when I tucked it away, and it’s a small quilt. Still, it’s finished, and I feel better for it!

Neutral Star - Finished

Neutral Star is a baby quilt, measuring 40.5″ X 40.5″. I started it on a whim in November of 2015, so it’s a very recent start. It’s another riff of the Made in Cherry quilt pattern, which is available for free via the Lecien webpage.

Rather than piece this out of charm squares, I used pre-cut, scrap, 2.5″ squares from my scrap bins. The background and binding fabric is a Cotton & Steel solid called peacock, which I used previously in Spice Garden.

No photos of the backing – I decided to use up two prints that were languishing in my stash. I’m not counting them against my total for the 2016, because I pulled all of the fabrics for this quilt before the new year even started.

It needs a washing – I can’t wait to see it when everything’s all crinkly fresh from the dryer, but I’ll get to see that soon. Laundry day approaches, lol.

Rhonda's [Quilt] Ramblings
See my original list of goals here.


Piecing as an Avoidance Mechanism

4 11 2015

I had Tuesday off from work, so I planned for Tuesday to be a sewing day. I thought I’d buckle down and work on the November’s sewing commitment.

Yeah, not so much.

I let myself get psyched out by it again, and instead decided on some easy piecing. Over the course of the day, with several breaks for meals, kiddo time, and napping, I put together a crib sized quilt top.

Quick Quilt Top

I used my pre-cut scraps stash, diving into my neutrals bucket and using a good portion of the 2.5″ squares. I also used more of the Cotton & Steel Peacock solid fabric. Eventually, I’ll use up the entirety of the six yards I bought.

The quilt top measures 40″ X 40″ (finished), and should be a breeze to quilt. I figure I’ll do straight line quilting, to keep it simple, and manageable on my domestic machine.

Apparently, this particular pattern ( a riff of the Made in Cherry pattern by Sarah Fielke) is going to be a go-to pattern for me. It’s a riff, because the original pattern called for charm squares. In addition to using 5″ squares, I’ve previously made this with 3″ squares. The 3″ squares make for a quilt top that finishes at about 50″ X 50″.

Of course, it helps that I can throw one of these babies together with very little math, and a whole lot of variation, depending on the fabrics used.

Linking to Freshly Pieced WIP Wednesday.


Finally, a Finish

23 05 2014

My first completed quilt for this year… I really need to get my tush in gear.

Patchwork Star - Finished

Done almost completely from items in my stash, with the exception of the batting. It was super satisfying to do, though ultimately, I’m not sure this will end up being given as a gift.

All told, I came close to using five yards of yardage between four different fabrics (one background, two in the backing, and one in the binding). This was incredibly satisfying, because it’s so easy to keep adding to the stash, regardless of how much I actually use.

I love that this is a pretty quilt, without being drenched in pastels. It finished up at about 50″ X 50″ inches, almost a lap-sized quilt. This one is so easy to put together – I’d probably make it  again in the future because it came together so quickly.

Linking up with Finish It Up Friday at crazy mom quilts. Also linking to the Whoop Whoop Friday party at Confessions of a Fabric Addict.


Quilted Goodness

18 05 2014

I woke up this morning, and I was raring to go. The alarm went off at 7:00 AM. By 7:30, I was sitting at the sewing machine, pedal to the floor.

It took five hours of straight line stitching, but by 2:00 PM, I had a completely quilted top:

Patchwork Star - Quilted

I used my walking foot, marching the edge of the foot along the seams. The thread is a lovely 100% cotton, variegated thread that runs from dark red to pastel pink. I thought it was a good addition to this quilt. I really like the contrast of the straight line quilting against the soft edges of the large scale print.

Patchwork Star - Quilting Back

I really love the way the quilting looks on the backside of the quilt. I do find myself wishing I’d had more of the cream and pink print to use for the backing, as the quilting is so striking against it. Ah, well, I used up three pieces of yardage that I had absolutely no plan for. I’ll take that as a win.

All that’s left to do is to make the binding and add it. I grabbed a stack of red prints – for some reason I’m certain it has to be a red binding – and draped them against the top:

Testing Binding Fabrics

I think the middle print of the five is my winner for the binding. If I’m lucky, making the binding will use up all I have of that print. Then, I’ll have used up four prints, and a bunch of scraps. So far, I’ve used four and a half yards, not including the scraps.

But, for now, I’m off to go see Godzilla. When I get back tonight, I’ll have make up the binding, and then I can finish this quilt up while going to and from work the next couple of days.


Patchwork Star Top

17 05 2014

I didn’t get to show many in progress shots of this top… there wasn’t much to it, though there was a sneak peek in last post. Inspired by Charmed, I’m Sure, which was worked up from the Sarah Fielke Made in Cherry pattern:

Charmed, I'm Sure

I decided to do a smaller patchwork star top. Instead of charm squares, I used 3″ squares from my pre-cut scraps. Squares in yellows, oranges, pinks, reds, and purples were added to the pile. After some  debate on what to use, I pulled a large scale Tracy Porter print:

Porter Print

I’ve had a soft spot for this fabric (and its coordinating prints) since I picked them up at Joann’s on a clearance sale. They’ve a lovely hand to them, almost a flannel finish. Beautiful stuff, and ideal for a baby quilt.

Patchwork Star Baby Quilt

It took a few evenings’ worth of piecing and ironing to get this together. Mostly in ironing, really. This pattern benefits wonderfully from nesting your seams. Honestly, it’s so simple, it really doesn’t need a pattern, just some basic math.

The photo doesn’t really do this quilt top justice… It was bright out when I took this photo, so it’s hard to tell just how beautifully the mix of scrap squares glows against the background fabric.

I’m picking up batting today for this – I only have large batts on hand, and I don’t want to cut into a package already earmarked for a larger project. My plan is to have this quilted this weekend, and then I’ll start quilting on something else. I have too many tops sitting around here.


Charmed, I’m Sure

25 03 2013

Almost a year ago, I stumbled across the pins and bobbins Made in Cherry Quilt-Along, and decided that the project was a great way to use the charms I was receiving from a swap. It was also a great way to stay motivated in managing my scraps.

Made in Cherry

Being who I am, I of course had to draw the design up in EQ7.

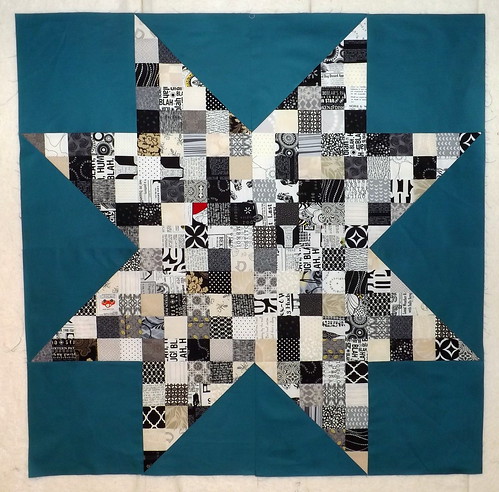
The original pattern by Sarah Fielke didn’t include any borders, but I liked the look with borders.

If you look closely at the illustration to the left, you can actually tell that I did my quilt-y math wrong. The black, inner border isn’t wide enough. It needs to be twice as wide.

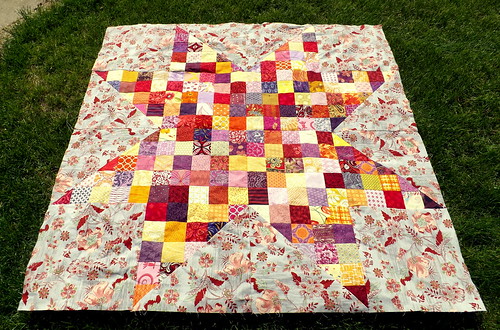
But no matter. I realized my mistake well before I actually added the border. I actually finished the center of the top months ago, in June 0f 2012. I also recognized some issues that had taken place in the cutting, causing some major waving in the big triangles.

I then folded it away, to await my participation in a second charm swap, to get enough for the border. Unfortunately, real life conspired against me, and I wasn’t able to join in.

So, the top sat, unfinished. For quite a while.

Until I decided that I had gotten through enough of my scraps to do the border. Ha! I ended up needing to cut 51 charms my stash, which I accomplished yesterday. This was after spending a day picking apart the major seams of the top, to fix the wavering issues.

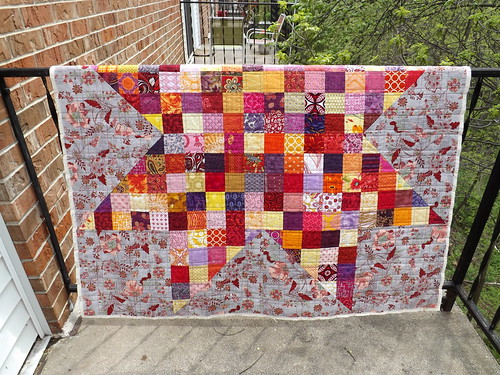
Very late last night (or very early this morning, depending on your definition), at around 1:30 AM, I finished adding the second border. It was entirely too big to photograph in my apartment, so I took it to work, thinking I could have a couple of students hold it over a railing. That didn’t happen, since I spent work working on a report and catching up on tasks. Plus, I have a sinus cold going on, and staying away from Kleenex for too long was not an option.

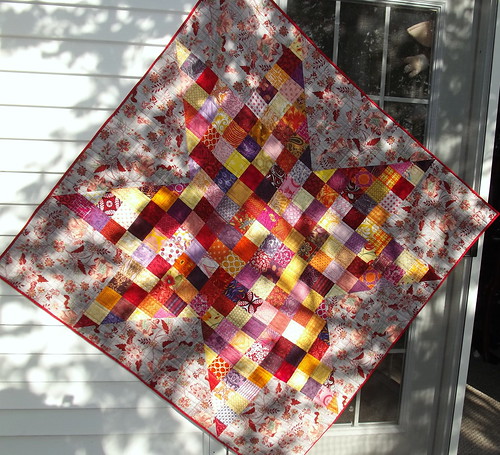
So, once I got home, I took advantage of my balcony once again, and caught a photo.

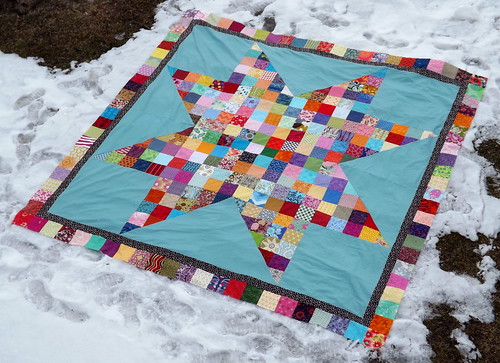
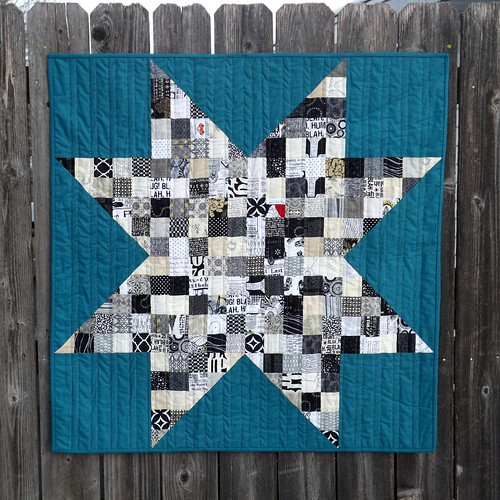
I present to you, Charmed, I’m Sure:

Charmed, I'm Sure

Overall, I’m pretty happy. I was very worried, as I pieced the final border, that I would have too much pink, yellow and green in it. I have very little blue in my stash, and by the time I got toward the end, my charms were definitely leaning toward the warmer side of things.

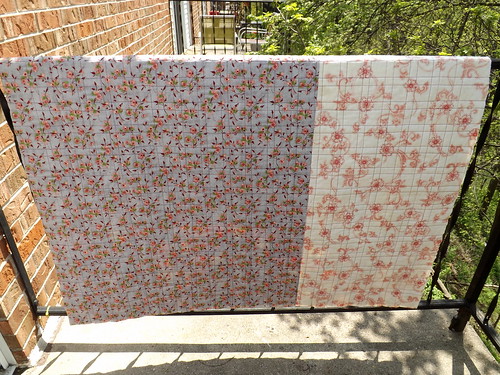
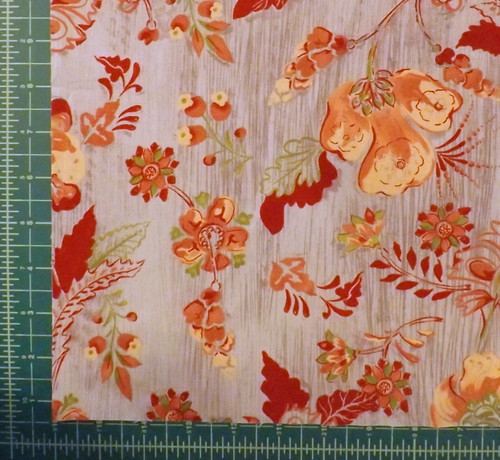
Cool beans for me – the inner border used up the remainder of a fabric in my stash. The backing and the binding will also come from my stash. Happiness.


The Taming of the Scraps

30 07 2012

Working on Fun with Free Piecing (which should really be called Cheating on the Farmer’s Wife, Part Deux) illustrated to me that I really, really need to get my scraps under control. I have a lot of them. I could probably fill a kitchen garbage sack with them.

And, silly me, I started browsing the internet. Enter the pins and bobbins Made in Cherry Quilt Along. I looked at the requirements for the project, and mentally said, “That’s easy!”

But first, I drew the project up in EQ7, because I do that:

Made in Cherry
The original, Sarah Fielke pattern didn’t have any borders, but I think I much prefer adding the two borders to this. I just really like scrappy borders, and any reason to use them, I swear.

So I started cutting charms. I’ve decided to try and do a similar quilt, but one in which each charm is unique.

Made in Cherry Charms

1. Made in Cherry Charms 1, 2. Made in Cherry Charms 2, 3. Made in Cherry Charms 3

So far, I’m 77 charms into prepping for this. Okay, so not just for this. I’ve spent several hours cutting scraps into four manageable sizes:

Trimmed Scraps

So  now I have a lot of pre-cut squares. I suppose it’ll be nice. I’m a little terrified that I actually went and cut 1.5 X 1.5″ squares. I see a postage stamp quilt in my future if this keeps up. Or a couple of Made in Cherry pillow shams.

Darn it! I need to stop planning projects!!